cacti整合nagios-cacti插件npc的使用
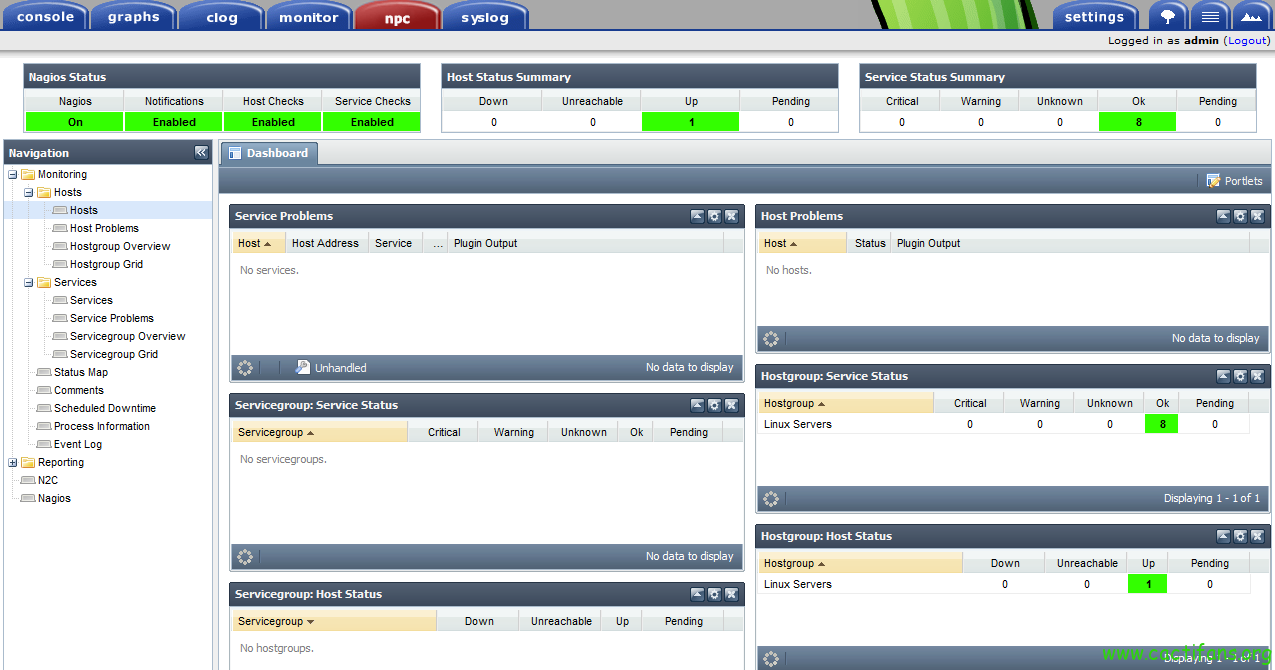
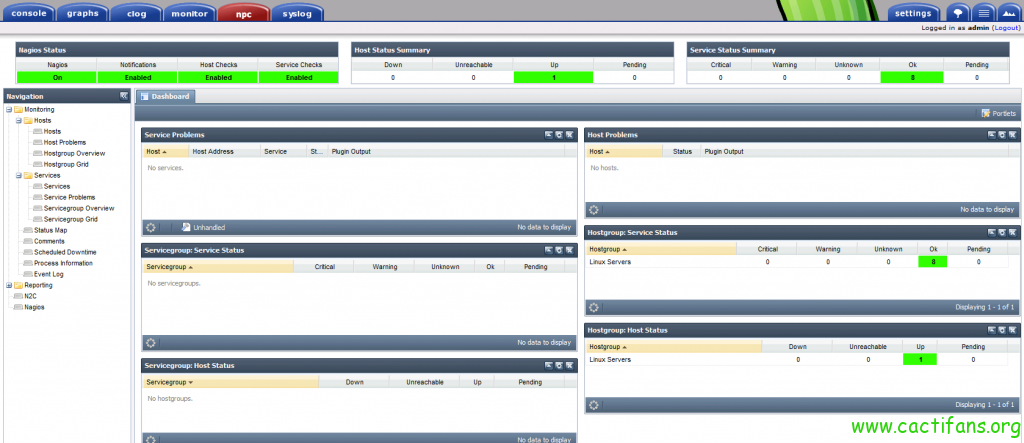
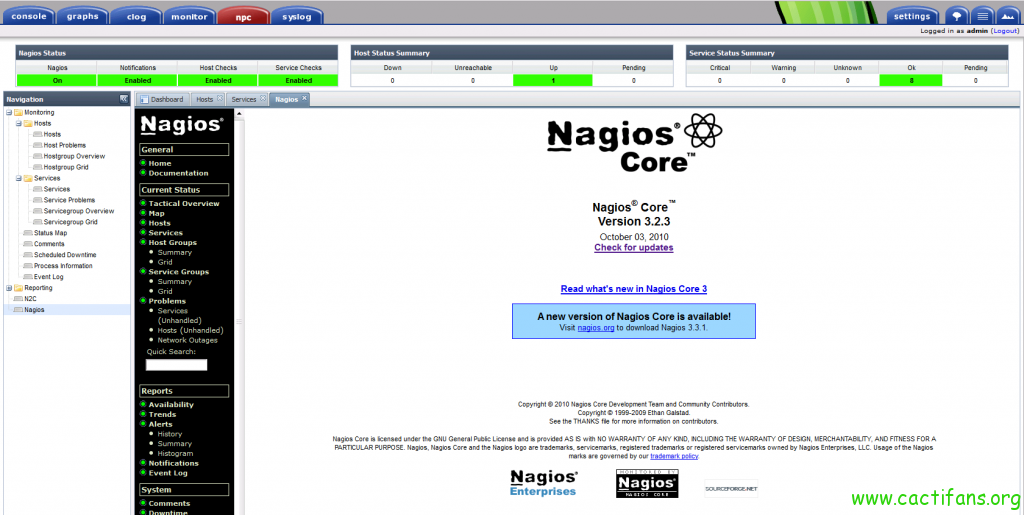
Nagios 是监控服务器的状态很强大,并且报警功能也不错,不过就是缺少直观的表示,在 cacti 的插件里有一个插件 NPC,通过 NDO可以把 Nagios 里的数据展示在 NPC 标签里,很直观的就可以看到各种信息如图:
图 2
下面说一下我本次的安装环境;
1.软件环境
OS:CentOS6.2 i386(最小化安装,只安装开 ssh-server)
cacti-0.8.7i-PIA-3.1
nagios-3.2.3-3.el6.rf.i686
ndoutils-1.4-0.beta8.1.el6.rf.i686 (nagios 的数据库支持)
settings-v0.71-1 (cacti 插件)
npc-2.4 ( nagios plugin for cacti ,cacti 插件)
2.环境支持
http mysql mysql-devel( ndoutils 需要它的支持)php php-devel rrdtool net-snmp libtool
注:有人说要安装php-json,经过测试在 CentOS5.5 里是要安装的,在 CentOS6 里,这个包已经在 php-common 里了,所以在安装 php 的时候就一起安装了
3.安装 cacti
A.关闭 SElinux
vi /etc/sysconfig/selinux
# This file controls the state of SELinux on the system.

# SELINUX= can take one of these three values:

#       enforcing - SELinux security policy is enforced.

#       permissive - SELinux prints warnings instead of enforcing.

#       disabled - SELinux is fully disabled.

SELINUX=enforcing

# SELINUXTYPE= type of policy in use. Possible values are:

#       targeted - Only targeted network daemons are protected.

#       strict - Full SELinux protection.

SELINUXTYPE=targeted
把 SELINUX=enforcing 改为 SELINUX=disabled 并保存!在这个时候 SElinux 还在运行关闭
setenforce 0
B.防火墙
一般我都是把防火墙直接关掉省的好多事情(生产环境不建议这么搞啊!嘿嘿!)
/etc/init.d/iptables stop
/etc/init.d/ip6tables stop
chkconfig iptables off
chkconfig ip6tables off
C.由于一些包在官方的库中没有,因此我们要建立 dag.repo,定义非官方库
vi /etc/yum.repos.d/dag.repo
[dag]

name=Dag RPM Repository for Red Hat Enterprise Linux
baseurl=http://apt.sw.be/redhat/el$releasever/en/$basearch/dag
gpgcheck=1
enabled=1
然后再导入非官方库的 GPG:
rpm --import http://dag.wieers.com/rpm/packages/RPM-GPG-KEY.dag.txt
安装 cacti 需要的环境包
yum install -y httpd mysql mysql-server  php php-mysql php-devel net-snmp net-snmp-utils
yum install -y zlib libpng freetype libjpeg fontconfig gd libxml2 patch wget
yum install -y rrdtool
下载 cacti-0.8.7i-PIA-3.1.tar.gz(这个是整合了 cacti 0.8.7 和 cacti-plugin-arch3.1 的)并解压
cd /var/www/html/
yum install wget -y
wget http://www.cacti.net/downloads/cacti-0.8.7i-PIA-3.1.tar.gz
tar zxvf cacti-0.8.7i-PIA-3.1.tar.gz
wget http://www.cacti.net/downloads/patches/0.8.7i/settings_checkbox.patch
cd cacti-0.8.7i-PIA-3.1
patch -p1 -N < ../settings_checkbox.patch
cd ..
mv -f cacti-0.8.7i-PIA-3.1/* /var/www/html/
rm -rf cacti-0.8.7i-PIA-3.1
chown -R apache:apache /var/www/html/
D.为 cacti 创建数据库和用户
service mysqld start
/usr/bin/mysqladmin --user=root create cacti
mysql -e "GRANT ALL ON cacti.* TO cactiuser@localhost IDENTIFIED BY 'cactifans.org'"
我们再导入 cacti 的数据库
mysql -ucactiuser -pcactifans.org cacti < /var/www/html/cacti.sql
修改 cacti 的配置文件并保存
vi /var/www/html/include/config.php

/* make sure these values refect your actual database/host/user/password */
$database_type = "mysql";
$database_default = "cacti";
$database_hostname = "localhost";
$database_username = "cactiuser";
$database_password = "cactifans.org";
$database_port = "3306";
设置 crontab 定时任务
由于我们是最小系统安装没有安装定时任务,因此我们首先安装
yum install vixie-cron
然后我们添加定时任务
echo '*/5 * * * * root /usr/bin/php /var/www/html/poller.php' >> /etc/crontab
设置服务开机自启动,重启服务
chkconfig snmpd on
chkconfig httpd on
chkconfig mysqld on
chkconfig crond on
service httpd restart
service snmpd restart
service mysqld restart
service crond restart
E.WEB 页完成安装
浏览http://xxx.xxx.xxx.xxx/index.php
就可以出再 Cacti Installation Guide 的页面了。NEXT–NEXT–FINISH。
用户名和密码为:admin/admin,之后输入新的密码,就完成了最基本的安装。
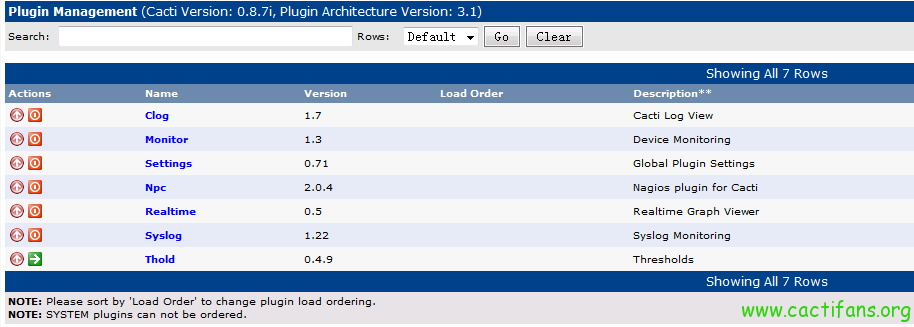
F.由于我们安装的这个版本已经在整合了 cacti-plugin-3.1,所以我们只要在 cacti 里启用就成了,点 console–User Management–admin
可以看到 Plugin Management ,选中它点 save 就可以启用 cacti-plugin
3.安装 ngios
nagios 我通过 yum 进行安装
yum install nagios nagios-plugin nagios-nrpe
这样就把 ngios 安装好了,安装好之后有几个地方需要配置一下,
A.设置 nagios 的访问用户及密码,默认用户为 nagiosadmin
htpasswd -c /etc/nagios/htpasswd.users nagiosadmin
如果你设置的用户不是 nagios 还需要修改 cgi.cfg(yum 安装会将 nagios 的配置文件放在/etc/nagios 下)
authorized_for_system_information=nagiosadmin
authorized_for_configuration_information=nagiosadmin
authorized_for_system_commands=nagiosadmin
authorized_for_all_services=nagiosadmin
authorized_for_all_hosts=nagiosadmin
authorized_for_all_service_commands=nagiosadmin
authorized_for_all_host_commands=nagiosadmin
修改以上几个的 nagiosadmin 为自定义的用户名,否则你将没有权限看见服务器的信息。
nagios 的安装到到此结束了,至于详细的配置网上也有很多例子。Nagios 的配置无非就是主机,服务,报警的配置,可以写成简单的脚本来实现快速添加。
4.安装 ndoutils
ndoutils 我也是通过 yum 安装的,比较方便这个需要用到 mysql 的 mysql-lib 及 mysql-inc,
因此需要安装 mysql-devel(yum install mysql-devel)
yum install ndoutils -y
然后我们配置 ndo2db.cfg (yum 默认安装的路径为 /etc/nagios/ndo2db.cfg)
vi /etc/nagios/ndo2db.cfg
socket_type=tcp
socket_name=/var/nagios/rw/ndo.sock
db_name=cacti
db_prefix=npc_
db_user=cactiuser
db_pass=cactifans.org
debug_level=1
debug_file=/var/nagios/ndo2db.debug
用的数据库为 cacti 的数据库,别的根据你自己的具体设置就成了
配置 ndomod.cfg (yum 默认安装的路径为 /etc/nagios/ndomod.cfg)
vi /etc/nagios/ndomod.cfg
output_type=tcpsocket
output=127.0.0.1
buffer_file=/var/nagios/ndomod.tmp
配置 nagios.cfg (yum 安装的默认路径为 /etc/nagios/nagios.cfg)
check_external_commands=1
command_check_interval = -1
event_broker_options = -1
broker_module=/usr/libexec/ndomod-3x.o config_file=/etc/nagios/ndomod.cfg
process_performance_data=1
5.安装 NPC
我在 npc 的官网没有下载到,下载的地址貌似已经不能用了,最后发现有 svn 的,于是我用 svn check 了一份(我已打包传到我的空间,点此下载)
wget https://www.cactifans.org/plugins/npc.tar.gz
tar zxvf npc*.tar.gz -C /var/www/html/plugins
chown -R apache:apache /var/www/html/plugins/npc
然后进入 cacti,点 Console–Plugin Management–并启用 npc 插件就是了
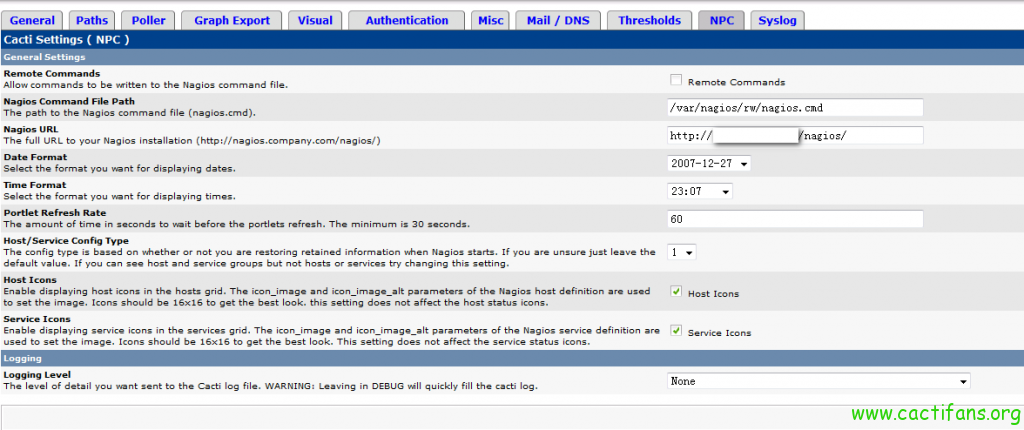
接着在右侧栏目中选择 settings,点选 npc 的标签
钩选 Remote Commands
Nagios Command File Path: /var/nagios/rw/nagios.cmd
这个文件启动 nagios 后会产生,根据实际的位置写,yum 安装的在默认在 /var/nagios/rw/nagios.cmd
Nagios URL:]http://yourserver/nagios/
保存就可以了。
接着启动 nagios ndoutils
service mysqld restart
service httpd restart
/usr/sbin/ndo2db-3x -c /etc/nagios/ndo2db.cfg
service nagios start
chkconfig nagios on
安装好之后在 npc 里只看到 nagios status 是 on 别的主机信息却是没有查看日志发现有如下信息
tail -100 /var/log/messages

Feb 24 12:02:37 localhost ndo2db-3x: Error: mysql_query() failed for 'INSERT INTO npc_servicestatus SET instance_id='1'

, service_object_id='5', status_update_time=FROM_UNIXTIME(1330055656), output='HTTP OK: HTTP/1\.1 200 OK - 1916 bytes i

n 0\.083 second response time', long_output='', perfdata='time=0\.083463s;;;0\.000000 size=1916B;;;0', current_state='0

', has_been_checked='1', should_be_scheduled='1', current_check_attempt='1', max_check_attempts='4', last_check=FROM_UN

IXTIME(1330055520), next_check=FROM_UNIXTIME(1330055820), check_type='0', last_state_change=FROM_UNIXTIME(1330011420),

last_hard_state_change=FROM_UNIXTIME(1330011420), last_hard_state='0', last_time_ok=FROM_UNIXTIME(1330055520), last_tim

e_warning=FROM_UNIXTIME(0), last_time_unknown=FROM_UNIXTIME(0), last_time_critical=FROM_UNIXTIME(1330011120), state_typ

e='1', last_notification=FROM_UNIXTIME(0), next_notification=FROM_UNIXTIME(0), no_more_notifications='0', notifications

_enabled='1', problem_has_been_acknowledged='0', acknowledgement_type='0', current_notification_number='0', passive_che

cks_enabled='1', active_checks_enabled='1', event_handler_enabled='1', flap_detection_enabled='1', is_flapping='0', per

cent_state_change='0.000000', latency='0.027000', execution_time='0.094000', scheduled_downtime_depth='0', failure_pred

iction_enabled='1', process_performance_data='1', obsess_over_service='1', modified_service_attributes='1', event_handl

er='', check_command='check_http', normal_check_interval='5.000000', retry_check_interval='1.000000', check_timeperiod_

object_id='2' ON DUPLICATE KEY UPDATE instance_id='1', service_object_id='5', status_update_time=FROM_UNIXTIME(13300556

56), output='HTTP OK: HTTP/1\.1 200 OK - 1916 bytes in 0\.083 second response time', long_output='', perfdata='time=0\.

083463s;;;0\.000000 size=1916B;;;0', current_state='0', has_been_checked='1', should_be_scheduled='1', current_check_at

tempt='1', max_check_attempts='4', last_check=FROM_UNIXTIME(1330055520), next_check=FROM_UNIXTIME(1330055820), check_ty

pe='0', last_state_change=FROM_
很多类似的错误,最后在 cacti 的论坛里找到了,是缺少一个表因此进入 mysql 执行如下语句
mysql -ucactiuser -pcactifans.org
use cacti;
ALTER TABLE `npc_hostchecks` ADD COLUMN `long_output` varchar(8192) NOT NULL default '' AFTER `output`;
ALTER TABLE `npc_hoststatus` ADD COLUMN `long_output` varchar(8192) NOT NULL default '' AFTER `output`;
ALTER TABLE `npc_servicechecks` ADD COLUMN `long_output` varchar(8192) NOT NULL default '' AFTER `output`;
ALTER TABLE `npc_servicestatus` ADD COLUMN `long_output` varchar(8192) NOT NULL default '' AFTER `output`;
ALTER TABLE `npc_statehistory` ADD COLUMN `long_output` varchar(8192) NOT NULL default '' AFTER `output`;
ALTER TABLE `npc_eventhandlers` ADD COLUMN `long_output` varchar(8192) NOT NULL default '' AFTER `output`;
ALTER TABLE `npc_systemcommands` ADD COLUMN `long_output` varchar(8192) NOT NULL default '' AFTER `output`;
ALTER TABLE `npc_notifications` ADD COLUMN `long_output` varchar(8192) NOT NULL default '' AFTER `output`;
exit;
这样操作之后刷新一次就可以了,现在已经正常了
